A Simple Basement Cold Room

Have you ever considered building your own cold room (root cellar) where you could store fruits and vegetables in the fall and winter and preserves throughout the year? It’s a fairly simple project when you have the space for it, ideally a basement with bare concrete walls.
In traditional the cold room of our ancestors, dug into the earth out back somewhere, cooling was carried out passively by surrounding and over it with earth. In this version most of the cooling is done by vents pierced into the wall. One brings cold air in, the other lets warm air out. And the concrete floor and walls also have a distinct cooling effect, plus being porous, they also increase the room’s humidity.
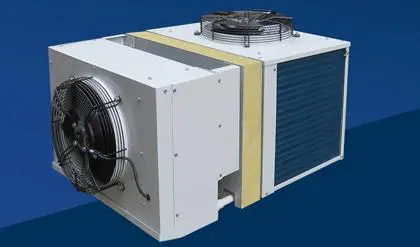
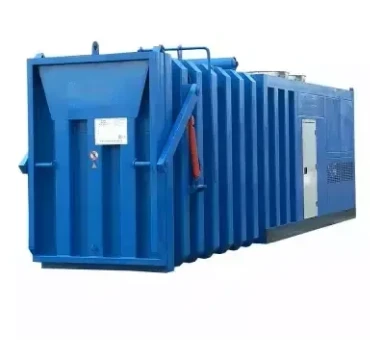
monoblock condensinng unit cold room
The ideal spot for a cold room is a corner in an unfinished basement. Why a corner? Because that will give you two naturally cold outside walls… and if one of those walls is a north wall, that’s even better (at least for readers in the Northern Hemisphere).
A cold room can be nearly any size. For easy circulation, just make sure it’s at least 6′ deep. Typically it will be about 8′ to 10′ long. Build custom walls to insulate the room from the rest of the basement… and obviously you’ll need to include a door in your plan as well. Since a cold room will be quite humid, use moisture-resistant building materials wherever possible, not just to eventually prevent rot, but to control any musty odors.
How to Do It
Start with the ventilation, as easy as installing two dryer vents at least 10” apart.

In the illustration above, a window in the cold room was replaced with a plywood panel, making installing the two vents extra-easy, as you can simply cut a hole in the panel with a jigsaw, but in most cases, you’ll need to rent a core drill with 4 ½” concrete drill bit (make sure the supplier explains how to use it!) to punch two round holes through the basement’s concrete wall. This will allow you to install 4″ dryer vents (i.e. the same vents used for clothes dryers). Look for vents with internal screening to prevent insects or animals from entering. Caulk well, both indoors and out. Add an adjustable manually operated damper to each so you control airflow and therefore temperature, keeping notably the cold intake nearly closed during the coldest days of winter.
Leave the outflow vent as is (see the illustration above), but run ductwork (dryer pipe, PVC pipe) from the intake vent down to the floor to direct cold air downwards. This will give you a system where cold air flows in and down to the floor, while warm air rises and exits via the outflow vent.
The next major step is to install the wall frame and door to measure.

Insulate the walls with rigid foam panels (more moisture-resistant than fiberglass), then staple plastic vapor barrier to the outside (vapor barrier should always be placed on the warm side of the structure). Now cover the outside with paneling or drywall. You don’t need to cover the inside wall… unless you want to.
Next insulate the ceiling, this time starting with thevapor barrier, then rigid foam insulation.
Hang an exterior door with insulation in the frame, sealing the base with weather stripping.
A LED stick-up light can provide lighting or you could install electric lighting before you put in the walls. It’s easy to find a battery-operated combined thermometer/hygrometer to fix to the wall so you can check storage conditions.
Finally, add shelving to your taste, remembering the air circulation is vital, so ventilated shelving may be best.
Using Your Cold Room

Your cold room will be functional for storing fruits and vegetables from mid-fall right through to early spring. Not many vegetables can be stored longer than that. If you can maintain temperatures around 35 to 45?F (2 to 7?C) and high humidity, around 90 to 95% (you may need to spray the floor with water every now and then), you can store rutabagas, turnips and winter cabbages for up to 6 months, even longer for potatoes, a bit less for carrots, and 3 months or so for beets and parsnip. A cold room can also be used to blanch strong-tasting vegetables like endives and cardoon to make them less bitter. Or try planting a few stumps of celery plants in a pail of damp sand. You can then harvest pale yellow but still edible celery stalks for several months.
Apples and pears store well in a cold room… but apples give off so much ethylene gas they may cause nearby vegetables to spoil. Placing them near the exhaust vent may help.

Fruits and most vegetables can be stored loose, in bins or baskets for example. Wrap winter cabbage loosely in newspaper. Carrots, beets, parsnip and other root vegetables are best layered and covered in slightly moist sand or dry leaves.
Onions, garlic, keeper tomatoes, pumpkins and squash, on the other, are not good choices for most cold rooms: they tend to spoil under cold humid conditions and are best kept in a cool, dry room somewhere else in the house
Finally, store only clean, intact, unblemished fruits and vegetables: they’re less likely to rot. And do examine your stock occasionally, removing anything that does start to spoil.
Beyond Fruit and Veggies
Of course, cold rooms can also be used to store preserves, jams, wine, beer, etc. all year long. And even in summer, they’ll be much cooler than the air outdoors and so can be used much like a refrigerator, that is, for the short-term storage of summer crops.
Good luck with your cold room!![]()


